Good news! Change Address on Aadhaar Online.
Step by step guide.
People often change cities or homes within city or get transferred find it cumbersome to get the address provided on the Aadhaar card updated as they find it difficult and tiring to stand in queue and also pay money to get the Aadhaar address updated.
Now, UIDAI has eased this process and here onwards you Can Change Your Address on Aadhaar Online.
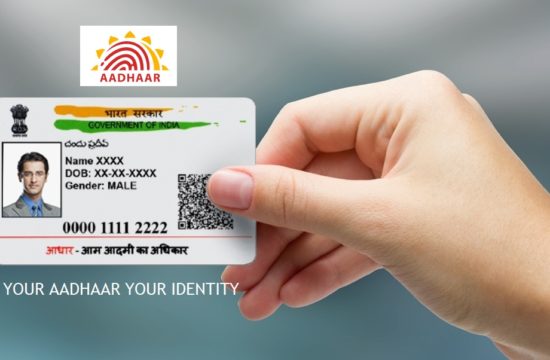
The Unique Identification Authority of India (UIDAI), that issues 12-digit Aadhaar number, has introduced a facility to change the address mentioned in Aadhaar card online.
People who wish to get their address updated on the card will no longer have to wait and pay for the same.
UIDAI has introduced the facility to update address online thereby providing immense convenience to the citizens who wish to get their address updated and too completely hassle free. Here is the step by step guide to complete the process online:
- Begin by going to the Aadhaar Self Service Update Portal
For online update of address on Aadhaar card, one must have registered mobile number. (It is the number provided at the time of enrolment for Aadhaar or updated subsequently).
Enter your Aadhaar Number to get an OTP (One Time Pin) on your registered mobile number with Aadhaar.
In case you have not registered your mobile with Aadhaar or changed your number then, you will have to visit nearest AadhaarUpdate Centre to update the mobile number.
2. Enter OTP received and Captcha to login to the Self Service Update Portal.
3. Select/Click the Address Update checkbox.
4. Fill the fields with the details to be updated in English as well as in local language. As of now SSUP is supporting the following local languages: Assamese, Hindi, Oriya, Urdu, Bengali, Kannada, Punjabi, Malayalam, Tamil, Gujarati, Marathi, Telugu. While correcting address, mention the complete address. The Updated Aadhaar letter with new address will be delivered at the given address only.
5. If you face any difficulty with the Pin Code and data related to (State/District/Village/Town/City/Post office), then contact UIDAI at help@uidai.gov.in
- If you wish to include Guardian/ Parent/Spouse Name as part of the address, select the Address correction option. Further select appropriate box in C/o details and mention the name of the person in the subsequent field. C/o details is optional and can be updated as a part of Address update. It is not mandatory to provide C/O details while correcting you address in Aadhaar.
- You need to fill the complete address and upload supporting Proof of Addess (PoA) even if you want to update/correct only C/o details. It will not matter if C/o details are not mentioned in your PoA document.
6. Only upload original scanned (with color scanner) copies of PoA document as per the Valid Documents List.
7. Do a review of the data entered for correctness and completeness in English as well as in local language. There will be no correction done by UIDAI in the information provided in your request.
8. Submit the reviewed address update request. Once submitted an Update Request Number (URN) will be generated that can be used for future tracking and reference.
9. You can also download /Print your Acknowledgement copy.
Following is an exhaustive list of valid documents:
Proof of Address (PoA) documents containing name and address that are currently supported
a) Passport
b) Bank Statement/ Passbook
c) Post Office Account Statement/Passbook
d) Ration Card
e) Voter ID
f) Driving License
g) Service photo identity card issued by PSU or Government Photo ID cards
h) Electricity Bill (not older than 3 months)
i) Water bill (not older than 3 months)
j) Landline Telephone Bill (not older than 3 months)
k) Property Tax Receipt (not older than 1 year)
l) Credit Card Statement (not older than 3 months)
m) Insurance Policy
n) Signed Letter having Photo from Bank on letterhead
o) Signed Letter with Photo, to be issued by registered Company on their letterhead
p) Signed Letter having Photo issued by Recognized Educational Instruction on letterhead
q) NREGS Job Card
r) Arms License
s) Pensioner Card
t) Freedom Fighter Card
u) Kissan Passbook
v) CGHS / ECHS Card
w) Certificate of Address having photo issued by MP or MLA or Gazetted Officer or Tehsildar on letterhead
x) For rural areas, Certificate of Address issued by Village Panchayat head or its equivalent authority
y) Income Tax Assessment Order
z) Vehicle Registration Certificate
aa) Registered Sale / Lease / Rent Agreement
ab) Address Card having Photo issued by Department of Posts
ac) Caste and Domicile Certificate having Photo issued by State Govt.
ad) For physically challenged – Disability ID Card/handicapped medical certificate issued by the respective State/UT Governments/Administrations
ae) Gas Connection Bill (not older than 3 months)
af) Passport of Spouse
ag) Passport of Parents (in case of Minor)
ah) Allotment letter of accommodation issued by Central/State Govt. of not more than three years old
ai) Marriage Certificate issued by the Government, containing address
aj) School Leaving Certificate (SLC) OR School Transfer Certificate (TC), containing Name and Address
ak) Extract of School Records containing Name, Address and Photo issued by Head of School
al) Certificate of Identity containing name, address and photo issued by recognized educational institution signed by Head of Institute.
Also read: Update photograph on Aadhaar, Income Tax Amendments applicable from September 1st 2019
Do not have address proof? Request a Validation Letter
In case you do not have address proof of the place where you now reside then too you can update the current address by requesting a Validation letter
Step 1: Visit Aadhaar Self Service Update Portal ssup.uidai.gov.in/ssup to place address update request with Aadhaar
- Enters verifier Aadhaar
- Receives SRN (Service Request Number)
Step 2: Address verifier gives consents: (Address verifier receives link for consent in his/her mobile)
- Click on link
- Logs in with Aadhaar
- Gives consent
Step 3: Resident now submits request: (He/she Receives confirmation of verifier consent on mobile)
- Log in with SRN
- Preview address
- Edit local language (if required), submits request
Step 4: Use Secret Code to complete:
- Resident will receive the letter along with secret code via Post
- Then, log into online address update portal
- Update address via secret code
- Review new address and submits final request
- A unique Update Request Number (URN) is received for checking update status in future.
UIDAI is constantly updating and refining the Self Service Aadhaar Portal to make the process of correction or updation to Aadhaar simple for the citizens.


[…] Change address on Aadhaar Online – With and without proof, step by step process […]